Let’s Get Started: The Raspberry Pi Laptop
The Raspberry Pi single board computer is pretty fricking cool. It can do most things that a full-sized desktop PC can do, and it’s small enough to fit in your wallet.
Smart people across the world have been leveraging its tiny size, low cost, and minimal power draw to create projects which give them greater control of their own hardware, and the kudos of having built it themselves.
In a previous article, we showed you our fabulous Raspberry Pi-based DIY Cloud, and now we’re going to show you how to make your Raspberry Pi properly portable, so that you can take it out on public transport and abuse the free WiFi by hacking everything in sight. If that kind of thing appeals to you.
We appreciate that not everyone in the world is an electronic engineer, and to most people, a breadboard is where the Hovis lives, so we’re going to keep things simple. No soldering required and no exotic components. We’ll be using super-cheap and readily available materials to transform our spanking new Raspberry Pi 4 into a laptop, and we’re going to do it for £20.
As always, this is a guide – not a tutorial, and in following it, you are following our winding trail of thought and research as we attempt to create the Ultimate Super-Simple Dirt-Cheap DIY Portable Raspberry Pi Laptop.
We’ll keep working on the title.
The Existential Question: What Is A Laptop?
Fundamentally, a laptop is a self contained computer which can sit on your lap. It needs some way of communicating information to you eg: a screen, and some way of receiving instructions from you eg: a keyboard and mouse. An independent power supply is nice, and some kind of case or container is essential so that you’re not spreading your cables through other people’s discarded coffee cups as you write your teen romance novel in a Starbucks somewhere.

Portable computing is about convenience and taking your stuff with you, and being able to use it, unfettered, whenever you want to.
The Dream Machine — A Cyberpunk Computer
If, like us, you have several dozen laptops in various states of disassembly cluttering up your back room, it’s probably already occurred to you that it would be nice to simply pop out the charred remains of a donor machine’s motherboard, slot in the pi, and wire everything up. But that just isn’t going happen. It’s not that it’s not possible, it’s just extremely difficult and involves skills that most people do not have.
Editors Note: If you do have those skills and want to thoroughly document a project, email us at [email protected]. We're always looking for writers!
The screens in most laptops require a separate controller. Even if you manage to correctly identify which variety you need, it will probably set you back around 30 to 50 bucks. Likewise, you you absolutely cannot plug a laptop power supply into your Raspberry Pi’s micro USB or USB C port. Even if you manage to graft a cable which would theoretically work, the voltage difference would result in a fried pi, which while sounding delicious, is not what we’re after. The battery would also not be able to charge without a dedicated power controller.
Then you’d need to melt, cut, or drill holes in the shell to allow access to your pi’s array of ports.
We estimate that converting a laptop shell into a pi container, while keeping its core functionality, would cost well in excess of $100 and require serious levels of knowledge. It’s not the bargain or easy option it first appears to be.
What’s Already Out There? A Lexicon of Raspberry Pi Laptops!

Funnily enough, we aren’t the first people who have dreamed the impossible dream of taking our Raspberry Pi out and about in the world, and we’re not the first people to have a DIY approach to the project either.
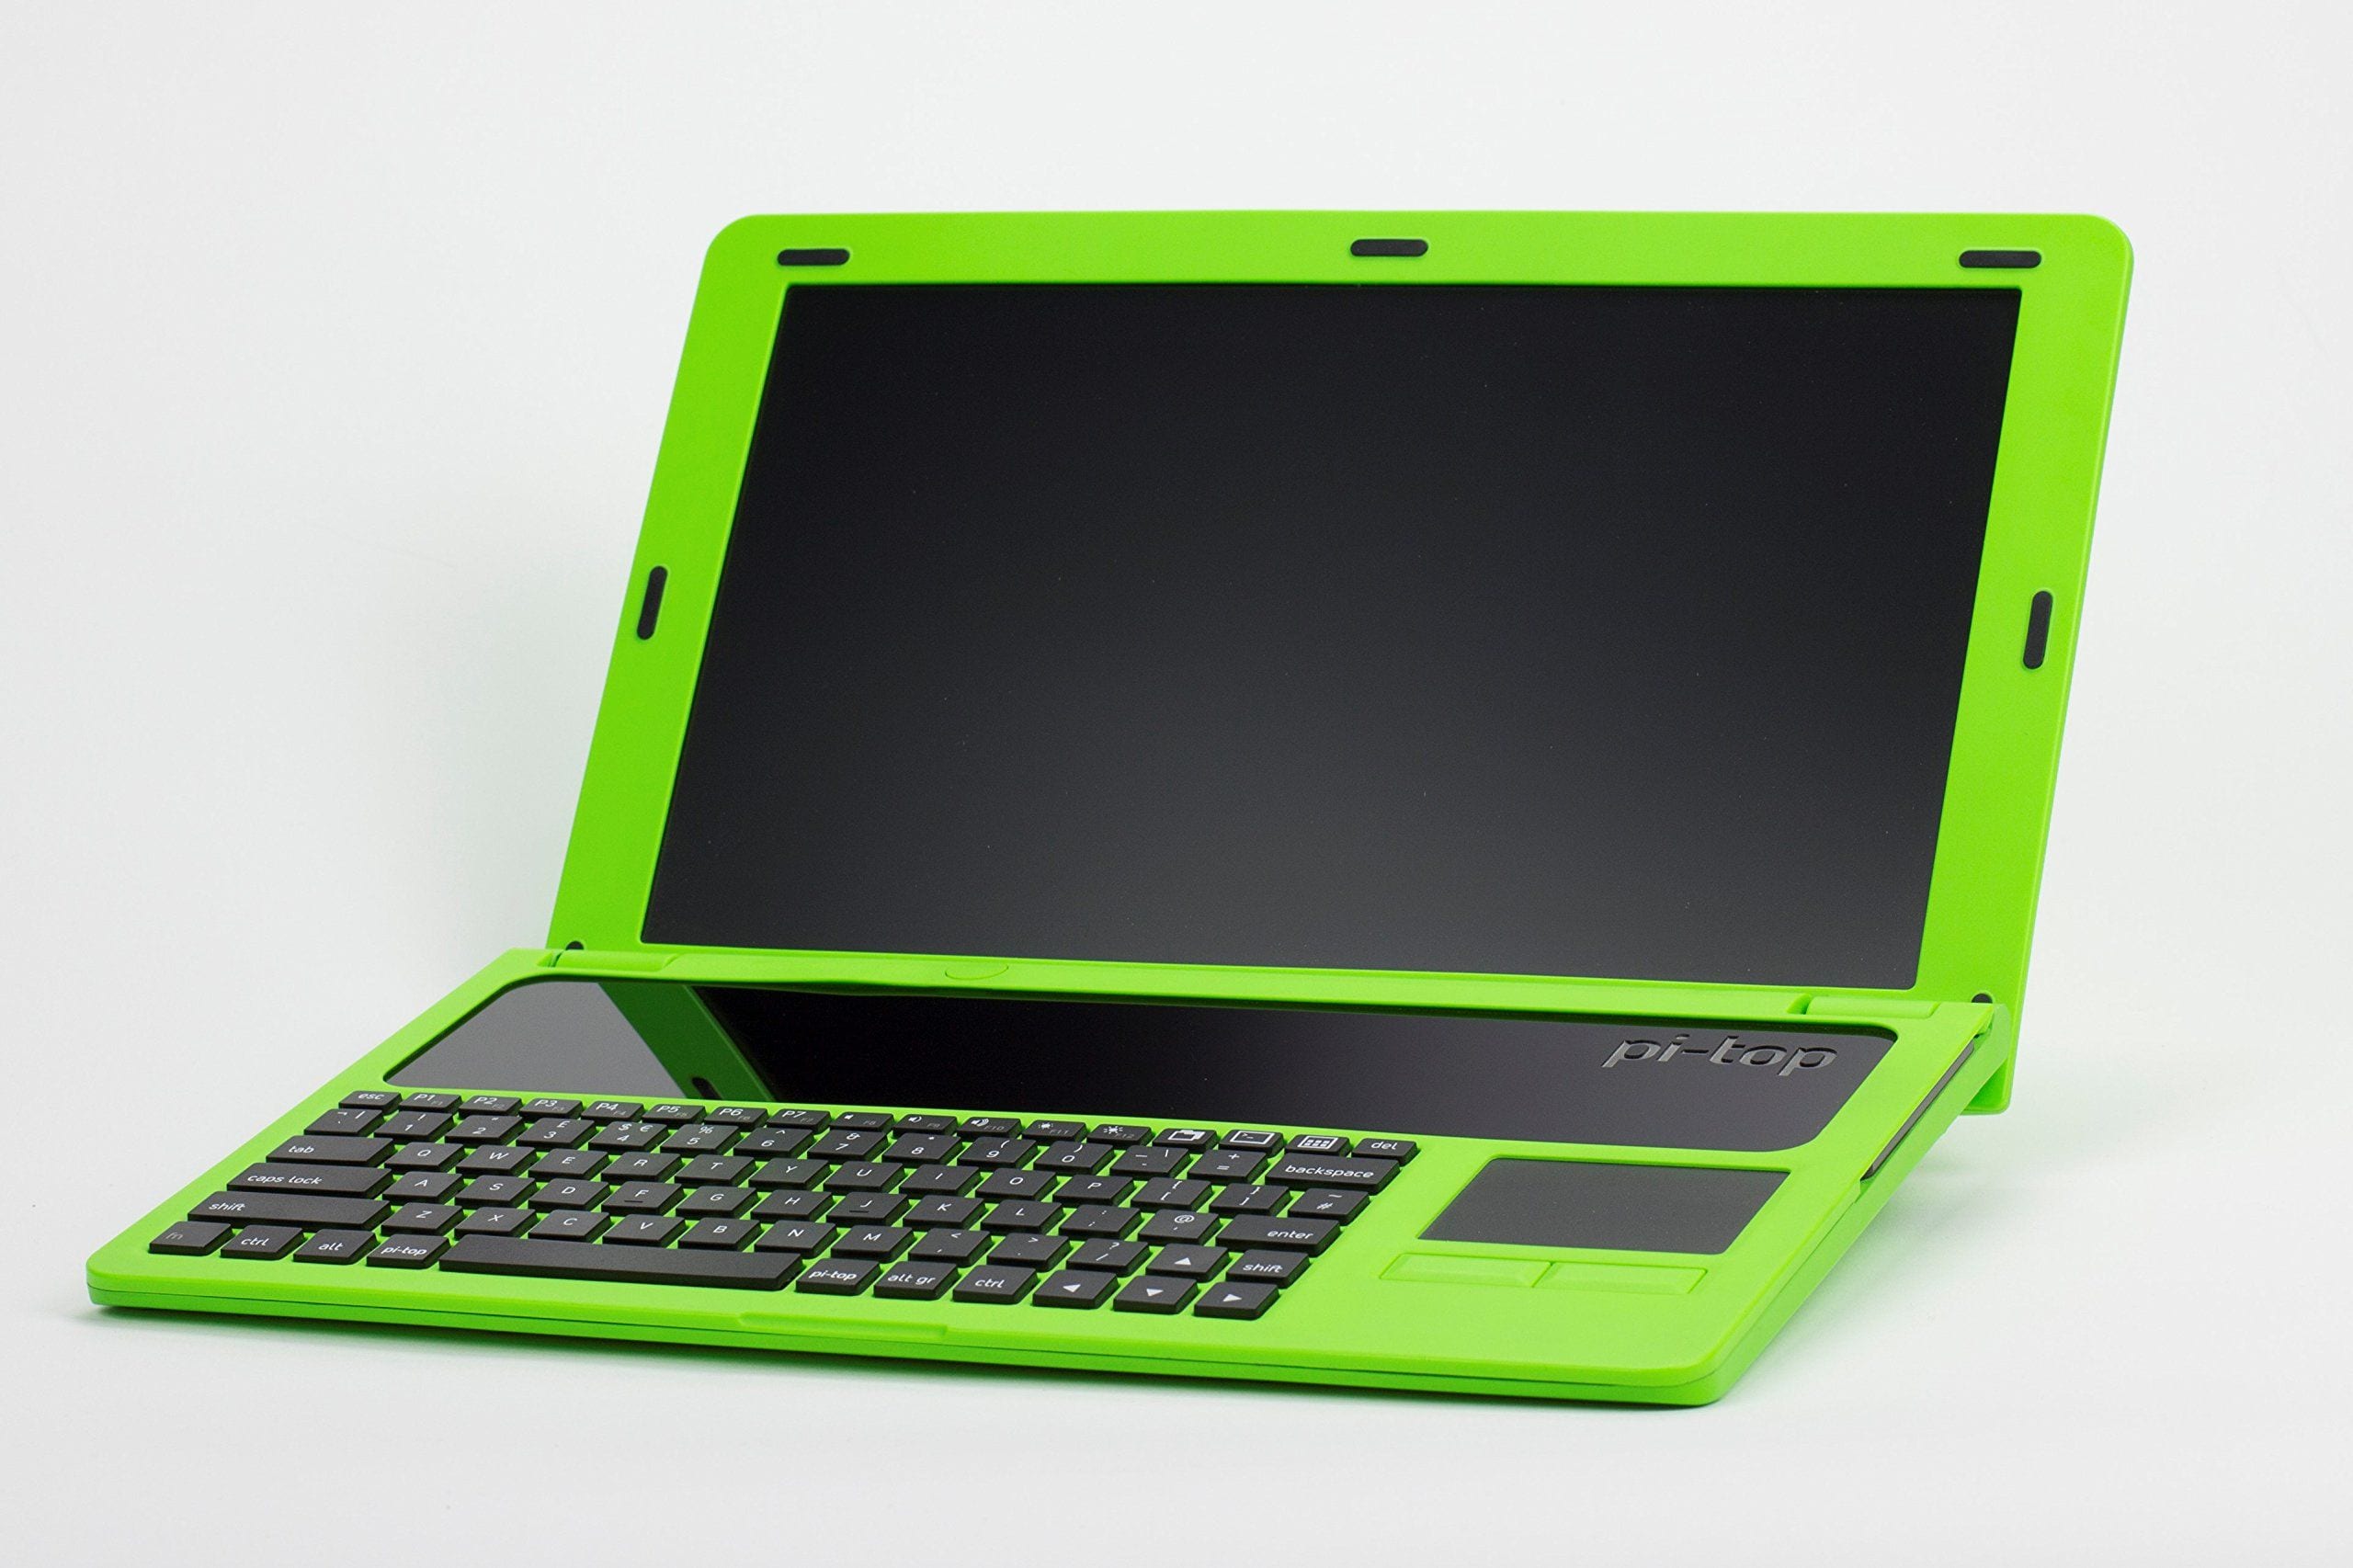
Pi Top’s DIY laptop kit is super snazzy, and comes with keyboard, trackpad, 13 inch HD screen, charger, SD card, and a ten hour battery life. Your Raspberry pi (the kit does not come with the actual pi) slots in beneath a slide-out cover between the keyboard and the screen.
It’s a fantastic idea, but it’s also £275 (about $350), so it’s hardly an economical option. Used versions can be found on Amazon US for considerably cheaper, albeit with one star reviews.
The next best almost pre-built option is the Motorola Atrix docking station. The Atrix was a revolutionary concept when it was released in 2011. Running hybrid Android / Ubuntu software, the phone would plug into its docking station using proprietary connectors, and be able to access the docking station’s keyboard and screen. Neat.
Starting in 2012, Raspberry Pi enthusiasts have written and filmed tutorials on how to use the Atrix dock with the Raspberry Pi. While it’s not especially complicated, it does involve some soldering and splicing of cables, at the end of which, your Pi will need to be mounted on the back of the unit or else left hanging loose.
Atrix docking stations are also really hard to find, and prices have shot up since Pi-based tutorials increased demand.
The third existing and “super-simple” option is to visit the official Raspberry Pi store and see what peripherals they have in stock.
For small displays, HATs are the simplest option. These LCD screens plug directly into the GPIO pins, and range in size from a tiny 1.8 inches to around 3.5 inches.
The small screens seem gimmicky, and while they might be ideally suited to a single-use hobby project such as a weather station, a Pi-Hole, or use as a smart home control system, they’re not at all suitable for use as a workstation screen – unless you want to take a magnifying glass out with you.
Larger options such as this 5 inch IPS display, without touchscreen functionality for $36, use the DPI interface, while 7 inch screens (the absolute minimum size required to get any serious work done), tend to use the HDMI port, and cost a bit more.
A DIY Decision: Going A Different Route
Screens are expensive, potentially costing more than the Pi itself, and touchscreen options are even more so. Once you add in the cost of portable power supply, you may as well just buy a cheap laptop and install Raspbian on it.
But the Raspberry Pi has a third video output besides the more obvious HDMI and HAT options, and that third option can keep our budget lower than you’d think possible.
Roughly halfway down the long edge of your Raspberry Pi, disguised as a standard 3.5″ audio jack, you’ll find an old-school, analogue composite port. It does work as a standard audio jack, but it can also send and receive video to most TV sets made since 1954.
The 50s weren’t especially known for their flat screen panels but the late 90s and early 2000s were – particularly in the form of portable DVD players, which were the only alternative to books or never ending games of I Spy on long, cross-country road trips with the kids, right up until the advent of the iPhone in 2007.
The great advantage of a portable DVD player, apart from the screen and the ability to play DVDs (not strictly necessary for this project, but cool nonetheless), is that they usually come with a built-in power pack capable of continuously spinning a plastic disc for upwards of two hours, while simultaneously firing lasers, and displaying images on a backlit LCD screen. If the motor and lasers aren’t in active use, that battery is going to last a lot longer.
When first released, portable DVD players would retail at over $1,000. They’re still being produced now (although only Thanos knows why), and sell new for $30 – $40.
Used, they clog up the shelves of charity shops with a $2 price tag, and are given away for free at the end of car boot sales because nobody wants them and the vendor doesn’t want to take them back home – just make sure they do actually have a composite port. Most will, but not all.
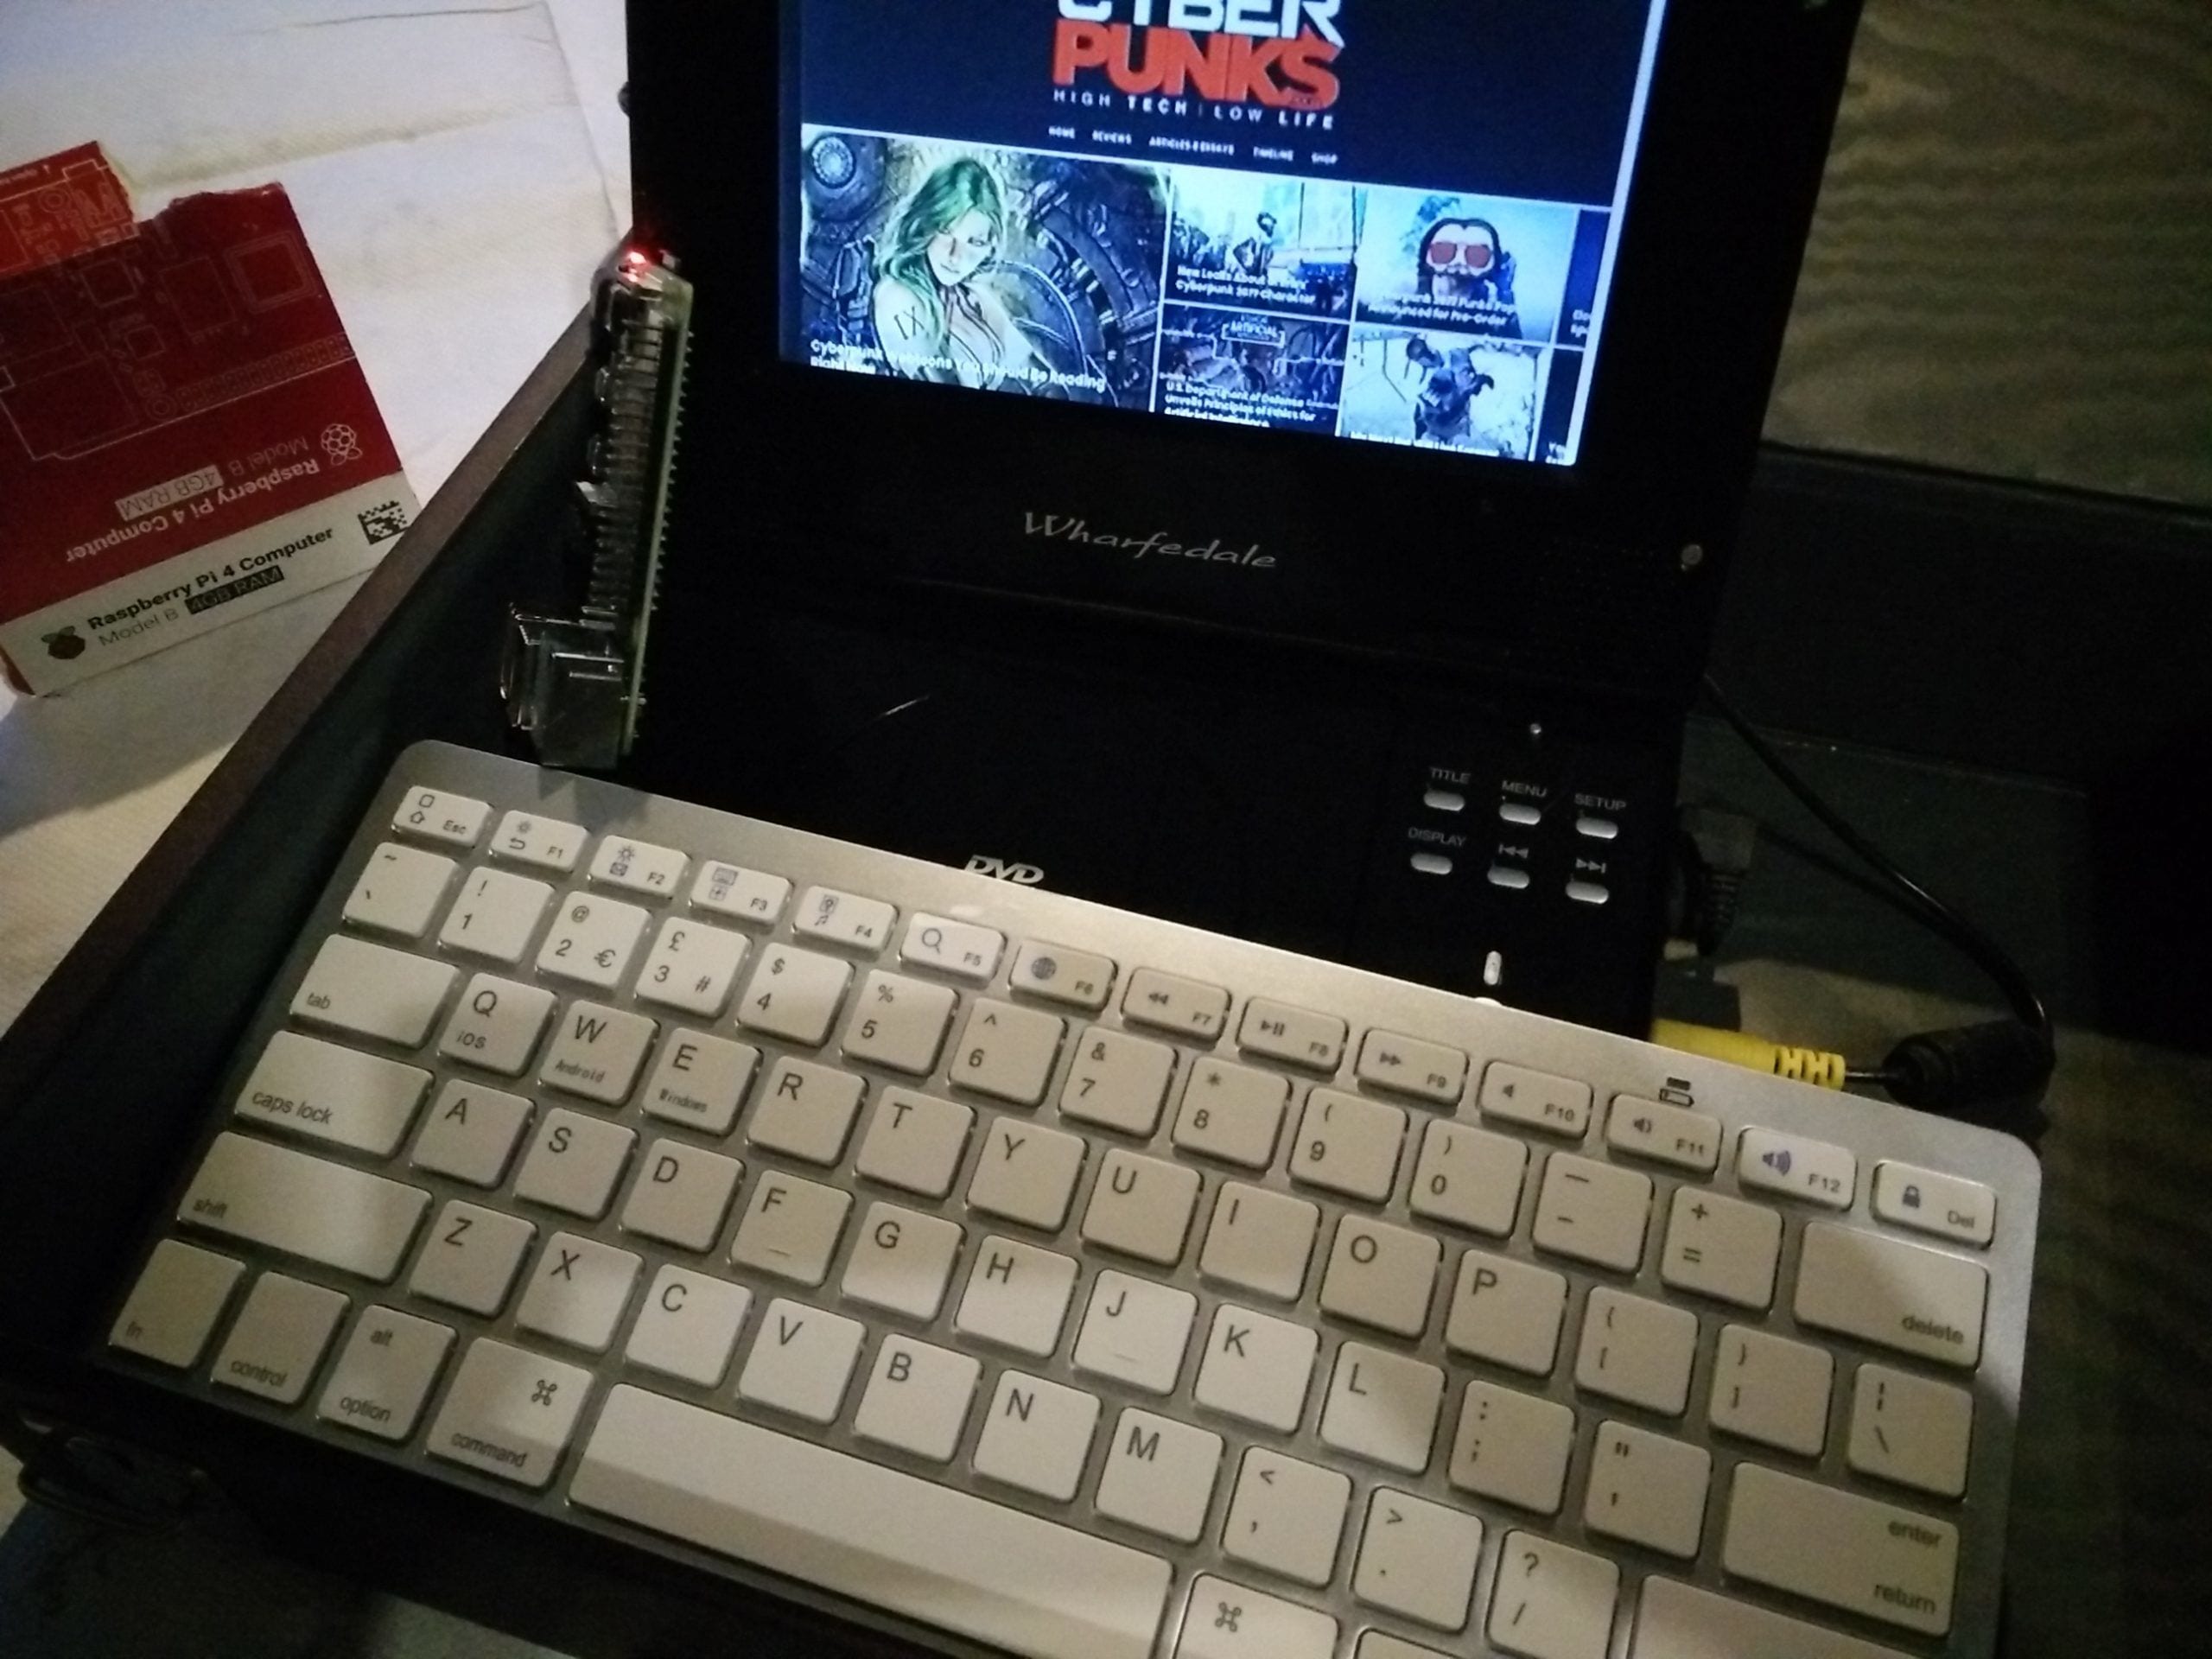
We picked up a Wharfedale portable DVD player, complete with 7 inch screen, remote control, built-in speakers, rechargeable battery pack, and power cable for £5 – about $7 – from Gumtree (The UK equivalent of Craigslist). We paid that much because only because we were in a hurry and didn’t feel like haggling.
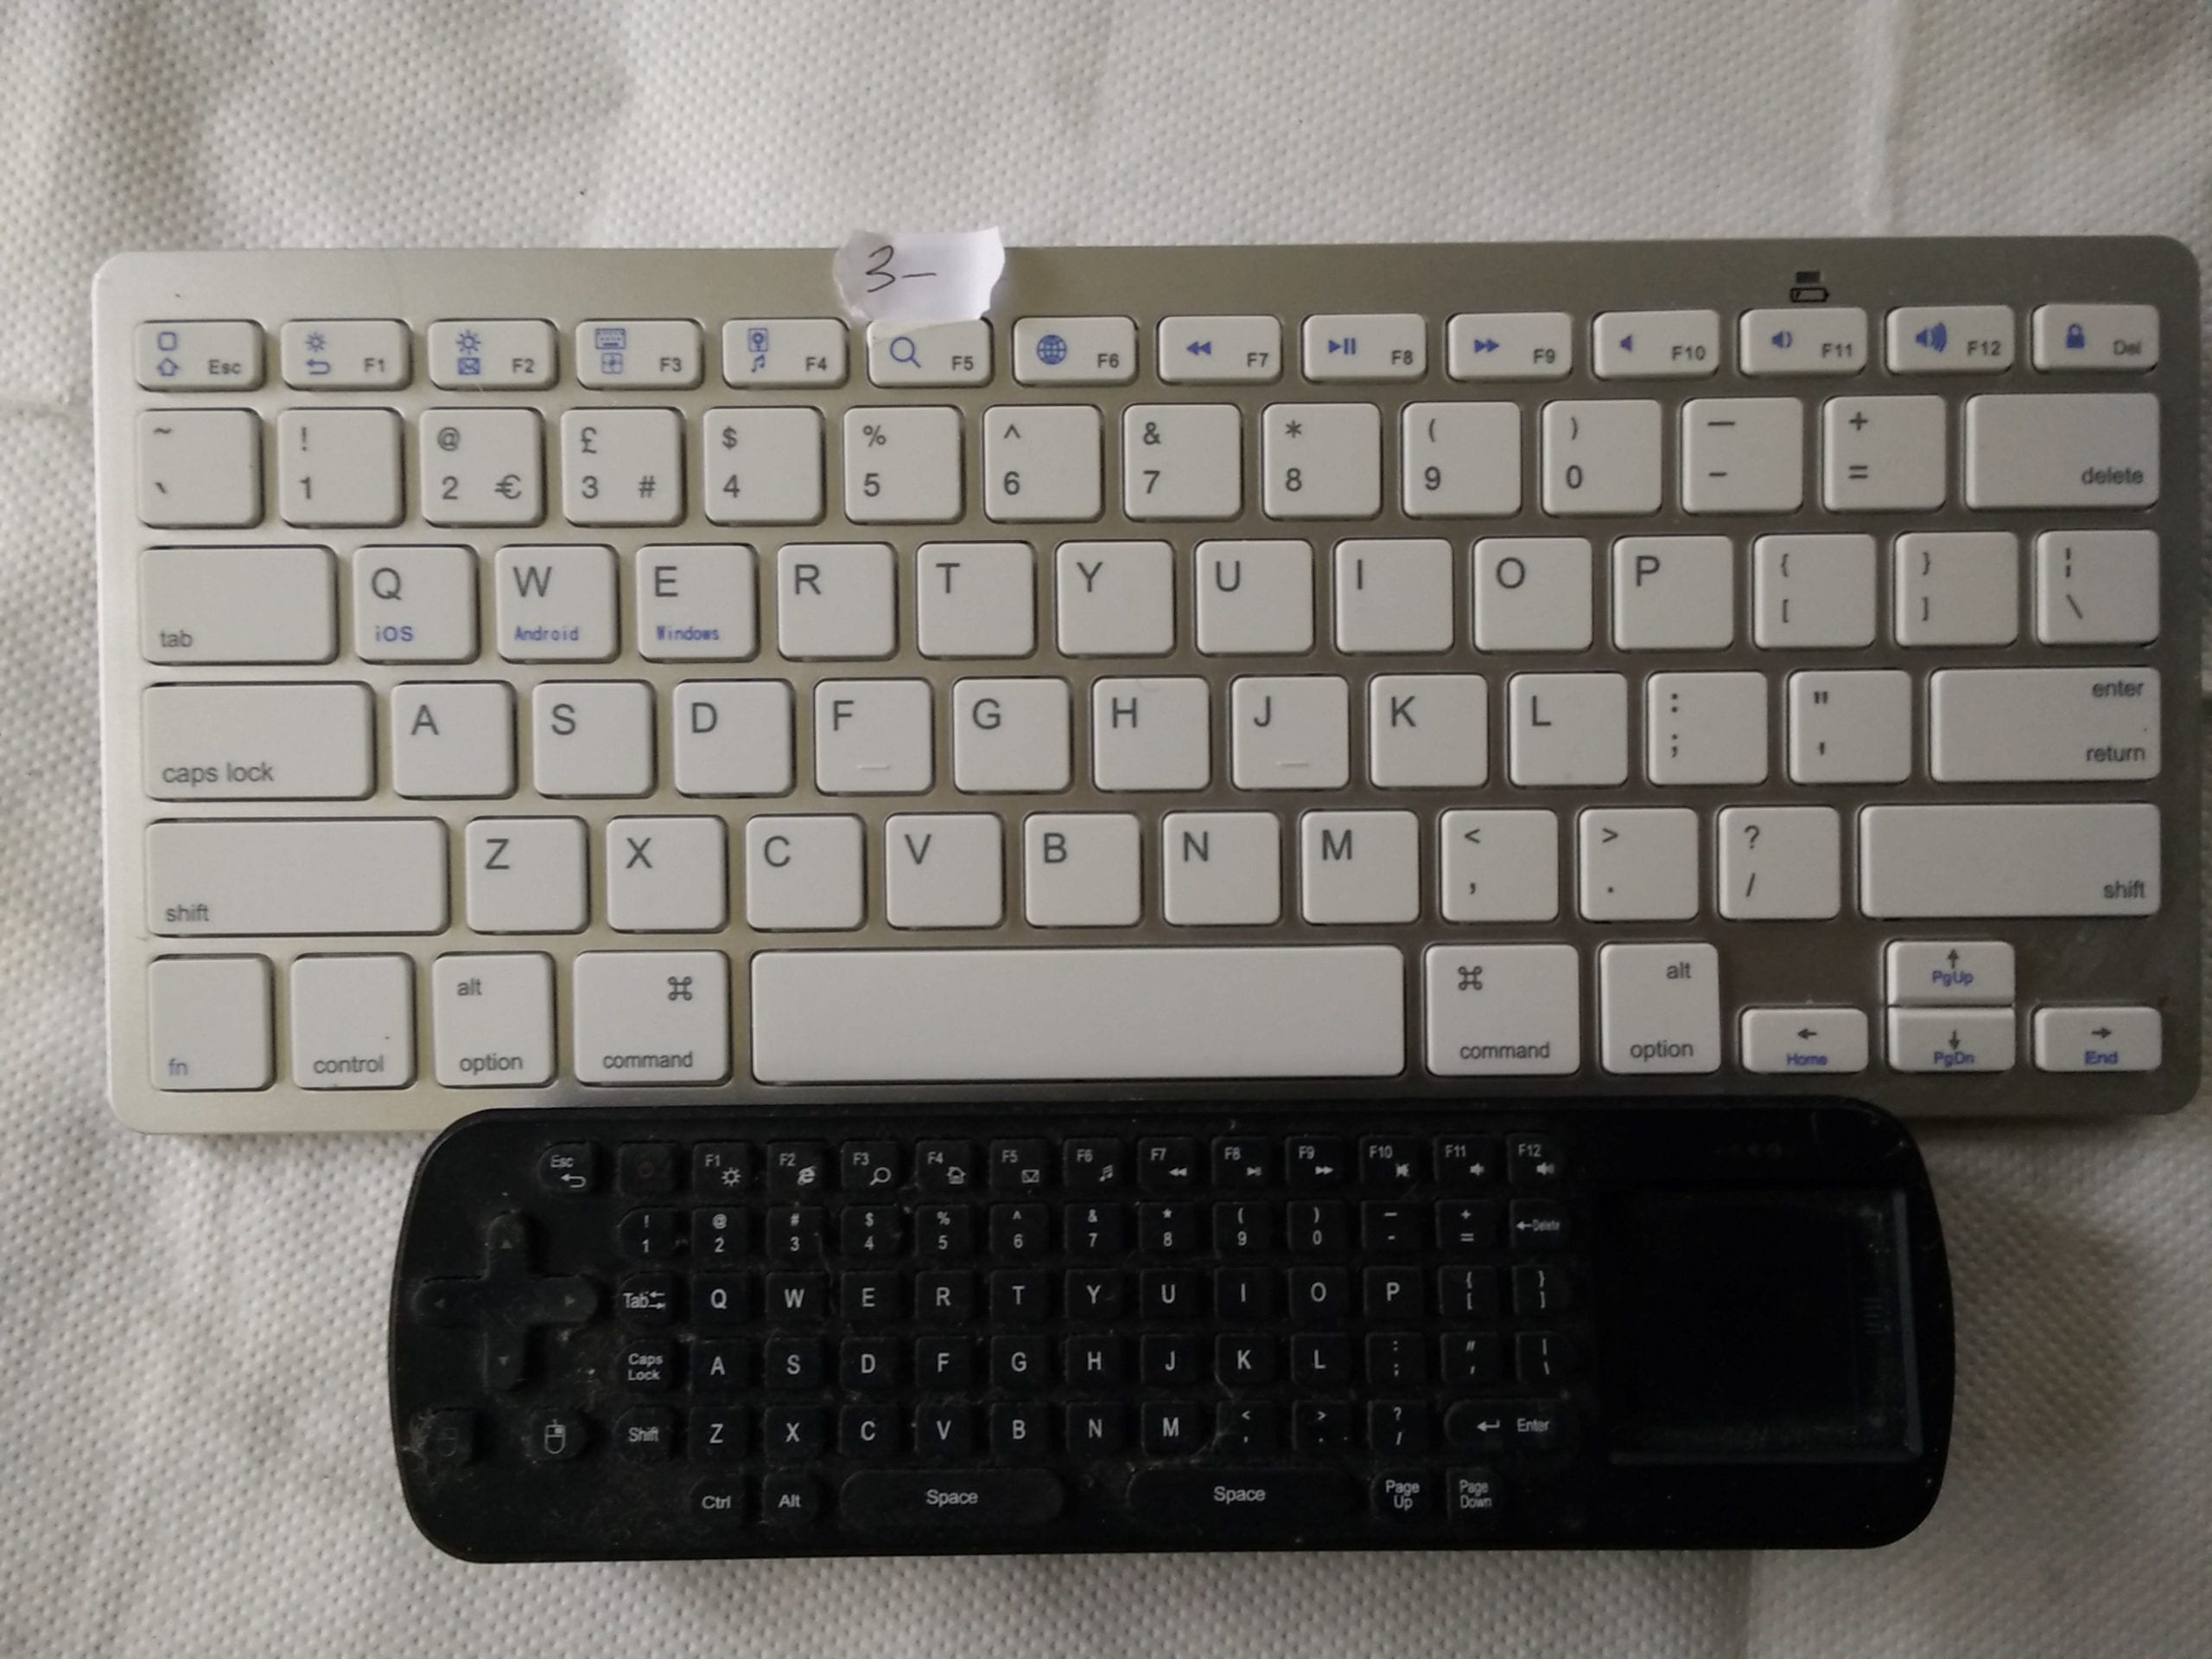
With the screen taken care of we needed a keyboard. Again, we went second hand and picked up two possibles from local charity shops.
The top keyboard is pretty much full sized and very nice to write on. The bottom one is horrible, but comes with a trackpad. Both are Bluetooth, and together, they cost a total of £3.50 ($4.42).

So far, we’ve spent a grand total of £8.50, and the penultimate item on our list is a power supply.
For this build, we’re using the Raspberry Pi 4B with 4GB RAM. Under load, it can pull down a hefty 3 Amps, and it requires a power bank with a USB C connection. We bought a 20000 mAh unit new from Amazon for $22 bucks with coupon. With the Pi working flat out, it should reliably pump juice for several hours – but unless we’re playing some heavy duty games, it should last significantly longer.
Of course, if you’re using an earlier model, such as the Raspberry Pi 3, you’ll have much lower power requirements and you’ll be able to take advantage of the far more common micro USB power socket. Micro USB powerbanks are cheap, and a 2000 mAH model can be had from our local Poundland for… one pound. With a current draw of ~ 700 mA, a 3B+ should be able to last a couple of hours with even the cheapest power bank.
All that’s left to do now is sudo raspi-config to enable the composite out, and find a nice way of arranging the equipment in a box of your choice. We happened to have a cassette carry case with a handle lying around. Other candidates could include a barbecue tools box, a cigar box, literally anything. It’s super cheap and super portable.

A E S T H E T I C
Yes. It’s ugly, but our talents lie in writing weird articles, creating cool DIY projects, and talking about ourselves in the third person. You can probably make yours look nicer.
What’s Next For The Ultimate Super-Simple Dirt-Cheap DIY Portable Raspberry Pi Laptop?
Sorry, little guy, but the next step is immediate recycling. The Pi itself will be used in several more projects before its final destination is decided; the DVD player together with both keyboards is heading immediately to the nearest charity shop; and the 20000 mAh battery pack will be accompanying us across Scotland on foot from the North Sea to the Irish sea in April.
If we were to do this project again, we’d have chosen the more expensive solar panel power banks available on Amazon, and the whole rig could come with us.


3 comments
You’ve gotten one of the best web-sites.
I was looking for a good display for a 3B+, and almost everything I saw was too expensive. Then I stumbled upon this article. Et voila! Turns out I had one of those dvd players! Mine has a broken charger and has been collecting dust for years now. I can probably get a charger, composite cable and a power bank under 30 bucks. Thanks!
You can probably get the required bits for a hell of a lot less that that!
Glad to be of help 🙂
David